Hi, long time no see! I just started learning Istio seriously so I would like a place to write down my understanding and additional thoughts I have.
Setup
You can find how to setup the platform here. I used minikube since its simple, but you can choose GKE if you want to avoid slow connection when pulling the images.
~> minikube start
😄  minikube v1.23.1 on Darwin 10.15.7
✨  Automatically selected the hyperkit driver
👍  Starting control plane node minikube in cluster minikube
🔥  Creating hyperkit VM (CPUs=2, Memory=4000MB, Disk=20000MB) ...
❗  This VM is having trouble accessing https://k8s.gcr.io
💡  To pull new external images, you may need to configure a proxy: https://minikube.sigs.k8s.io/docs/reference/networking/proxy/
🐳  Preparing Kubernetes v1.22.1 on Docker 20.10.8 ...
    ▪ Generating certificates and keys ...
    ▪ Booting up control plane ...
    ▪ Configuring RBAC rules ...
🔎  Verifying Kubernetes components...
    ▪ Using image gcr.io/k8s-minikube/storage-provisioner:v5
🌟  Enabled addons: storage-provisioner, default-storageclass
🏄  Done! kubectl is now configured to use "minikube" cluster and "default" namespace by default
Installation
Next step is to actually install the Istio Operator. There are many methods to
install it as documented
here. I used the
istioctl method because I don't need any configuration yet and I need the
istioctl client anyway at later steps to inspect the Istio and Envoy configs.
My tips is to install istioctl via the asdf
plugin if you need multiple
versions for upgrades, make your PATH neater and vice versa.
For this installation I run the install command with the demo profile.
~> istioctl install --set profile=demo -y
✔ Istio core installed
✔ Istiod installed
✔ Egress gateways installed
✔ Ingress gateways installed
✔ Installation complete
Then don't forget to enable Istio sidecar injection by running the following command.
~> kubectl label namespace default istio-injection=enabled
namespace/default labeled
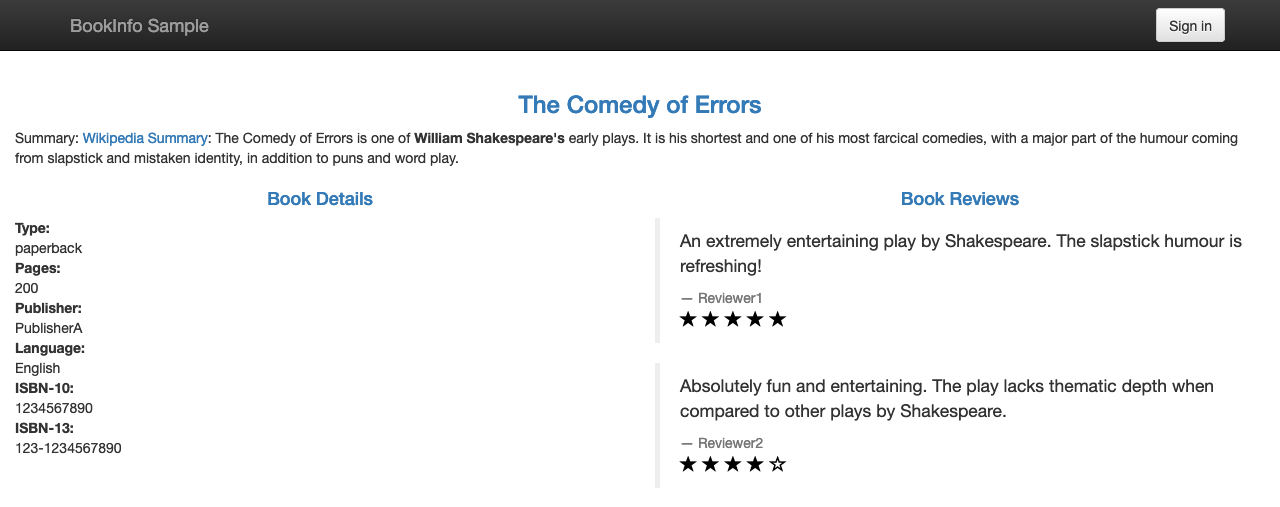
Now, we can deploy our application with Istio enabled.
istio> kubectl apply -f samples/bookinfo/platform/kube/bookinfo.yaml
service/details created
serviceaccount/bookinfo-details created
deployment.apps/details-v1 created
service/ratings created
serviceaccount/bookinfo-ratings created
deployment.apps/ratings-v1 created
service/reviews created
serviceaccount/bookinfo-reviews created
deployment.apps/reviews-v1 created
deployment.apps/reviews-v2 created
deployment.apps/reviews-v3 created
service/productpage created
serviceaccount/bookinfo-productpage created
deployment.apps/productpage-v1 created
istio> kubectl get svc
NAME          TYPE        CLUSTER-IP       EXTERNAL-IP   PORT(S)    AGE
details       ClusterIP   10.106.46.17     <none>        9080/TCP   42m
kubernetes    ClusterIP   10.96.0.1        <none>        443/TCP    18h
productpage   ClusterIP   10.108.228.75    <none>        9080/TCP   42m
ratings       ClusterIP   10.100.216.246   <none>        9080/TCP   42m
reviews       ClusterIP   10.99.129.200    <none>        9080/TCP   42m
istio> kubectl get po
NAME                              READY   STATUS    RESTARTS   AGE
details-v1-79f774bdb9-tdjvc       2/2     Running   0          42m
productpage-v1-6b746f74dc-j84xc   2/2     Running   0          42m
ratings-v1-b6994bb9-4k9tt         2/2     Running   0          42m
reviews-v1-545db77b95-xql7k       2/2     Running   0          42m
reviews-v2-7bf8c9648f-bv2ld       2/2     Running   0          42m
reviews-v3-84779c7bbc-zh45t       2/2     Running   0          42m
Next, to expose our application to outside traffic we need to create an Istio Ingress Gateway along with the Virtual Service that will route the traffic from your gateway to the actual service.
istio> kubectl apply -f samples/bookinfo/networking/bookinfo-gateway.yaml
gateway.networking.istio.io/bookinfo-gateway created
virtualservice.networking.istio.io/bookinfo created
Then we also need to apply the destination rules so Istio can manage the load balancing later.
istio> kubectl apply -f samples/bookinfo/networking/destination-rule-all.yaml
destinationrule.networking.istio.io/productpage created
destinationrule.networking.istio.io/reviews created
destinationrule.networking.istio.io/ratings created
destinationrule.networking.istio.io/details created
To open our application from browser, we need to determine the ingress host and port number. The method varies between each platforms as documented here. Since I used minikube I can run these commands.
export INGRESS_PORT=$(kubectl -n istio-system get service istio-ingressgateway -o jsonpath='{.spec.ports[?(@.name=="http2")].nodePort}')
export SECURE_INGRESS_PORT=$(kubectl -n istio-system get service istio-ingressgateway -o jsonpath='{.spec.ports[?(@.name=="https")].nodePort}')
export INGRESS_HOST=$(minikube ip)
export GATEWAY_URL=$INGRESS_HOST:$INGRESS_PORT
echo "http://$GATEWAY_URL/productpage"
Click on the printed URL! Congrats! Now we are finally able to access our service.
We should also install Istio add-ons that will help us to observe the telemetry exposed by default from Istio.
kubectl apply -f samples/addons
kubectl rollout status deployment/kiali -n istio-system
Then open the Kiali dashboard by running this command.
istioctl dashboard kiali
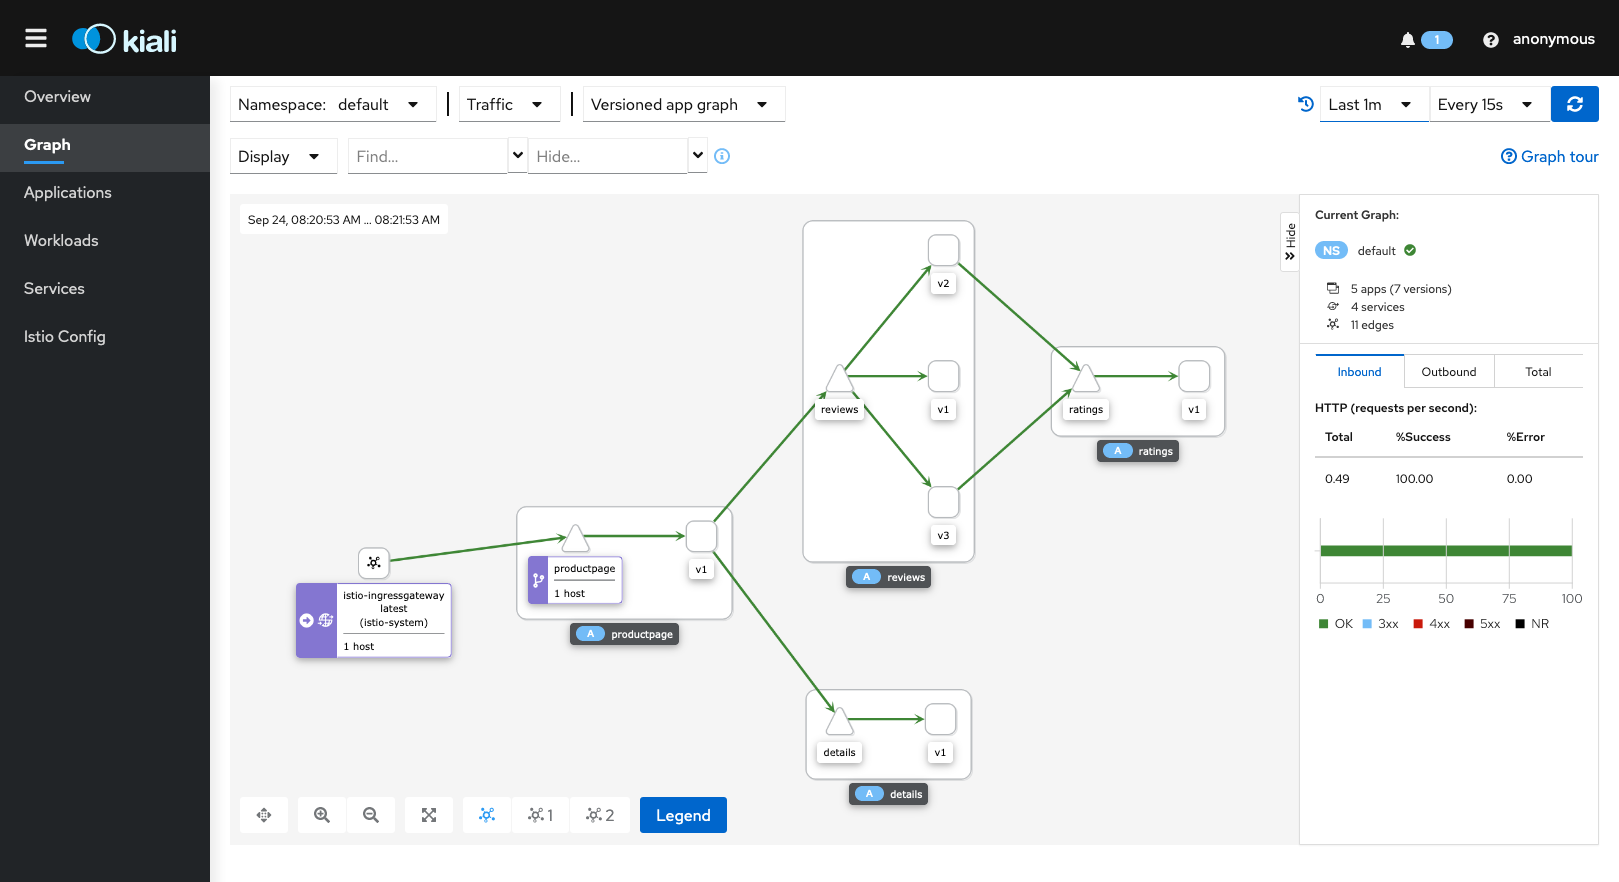
With this setup, we're able to have our toy service running and also gain understanding of its structure, topology.